If you need to change fluorescent tubes, pause a moment. You don’t have to buy fluorescent replacements. There’s another option: LED tubes.
LED tubes are the bright, low energy, long life alternative to fluorescent lighting. A T8 two-foot LED tube, for example, gives you 750 lumens of light, uses just 11 watts of power, and lasts for 40,000 hours.
With LED tubes, you can also say goodbye to fluorescent flickering. LED lights never flicker. What’s more, you don’t have to worry about harming the environment. Unlike fluorescent lighting, LED tubes don’t have any mercury in them.
You can put LED tubes into existing fluorescent fitments. First, though, you need to make certain adjustments. The process is straightforward, but you may prefer to use or consult a suitably qualified electrician.
Our guide below details the steps to take to install new Crompton Lamps LED T8 tubes only. If you are looking to install another brand of LED tubes, please refer to the manufacturer’s instructions.
If you’re unsure whether you can do this yourself, we’d advise you to consult a qualified electrician to do the job for you.
Time needed: 5 minutes
- Disconnect the power supply
Ensure you’ve disconnected the fitment from the power supply. Carefully remove the fluorescent tube.
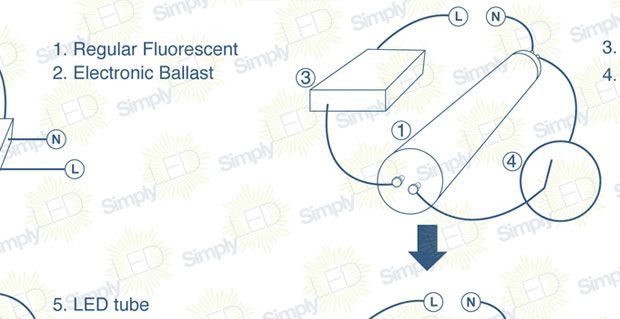
- Identify the ballast type
Fluorescent fitments come in two types. Your fitment will either have an electronic ballast unit, or a starter plus a magnetic ballast unit. Check to see what type of fitment you have.
- Electronic ballasts
You must remove the electronic ballast unit. If you don’t, you’ll damage your LED tube. Disconnect the wires from the ballast unit. Remove the unit and connect the loose wires to form a circuit. Ensure the connections are secure and insulated.
- Magnetic ballasts
If you have a fitment with a starter and a magnetic ballast unit, you must remove the starter. You don’t need to remove the ballast unit unless you’re placing more than one LED tube in the fitment. If you remove the ballast unit, connect the loose wires to create a circuit. Make sure you have properly secured and insulated the wires.
- LED Tube LIVE end
Your LED tube has a live connection at one end and a neutral connection at the other. Ensure the wires in the fitment match this. If you connect both live and neutral to one end of the LED tube, you’ll cause a short circuit.
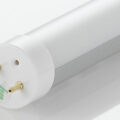
- Fit the LED tube
Carefully fit your new LED tube. The tubes come in sizes to match existing fluorescent fitments. Common lengths are two foot, four foot, five foot and six foot.
- Connect the power supply
Reconnect the fitment to the power supply. Switch on your new LED lighting.
You can appreciate the difference an LED tube makes the moment you put it on. So if you have any fluorescent tubes at home or work, consider the LED option. It makes sense.
Related posts:
 How to Install LED Light Bulbs: A Step-by-Step GuideSwitching to LED light bulbs is an excellent way to save energy and money in the long run. However, if you’re new...
 What are LED tubes and why should we use them?As LED technology advances, more and more people are choosing to make the switch and there is no difference when it comes...
Are LED Tube Lights Ready to Take Over From Fluorescents?Over the last five decades, fluorescent tube lighting has become a commonplace feature of our lives, especially in offices. But there’s now...
What are LED tubes and why should we use them?As LED technology advances, more and more people are choosing to make the switch and there is no difference when it comes...
Are LED Tube Lights Ready to Take Over From Fluorescents?Over the last five decades, fluorescent tube lighting has become a commonplace feature of our lives, especially in offices. But there’s now...
 Le Tour de LED – be seen when you’re ‘on yer bike’!It’s been a memorable year for cycling in the UK. Bradley Wiggins got things rolling with his phenomenal victory in the Tour...
very informative and instructive post about LED tubes. These LED’s are energy saving and cost-effective.